Dargan Real Estate - Myrtle Beach, SC

Office: (843) 712-2585 Fax: (888) 712-1027 Email Us

  • Property Search
  • Featured
  • Oceanfront Property
    • Oceanfront Condos
    • Oceanfront Estates
  • Local Area
    • Carolina Forest
    • Garden City
    • Little River
    • Murrells Inlet
    • Myrtle Beach
    • North Myrtle Beach
    • Pawleys Island
    • Surfside Beach
  • About
    • About Us
    • Meet Our Realtors
  • Blog
  • Join Our Team
  • My Account
diy

Easy Room Makeovers

May 10, 2016 by Nicole

shutterstock_268789436


As much fun as it can be to decorate your home, it can also be pretty time consuming and cause you to put it off longer than you would like to. With Spring in full swing, the urge to redecorate is strong. We have some ideas for you that can make over your home in a flash.

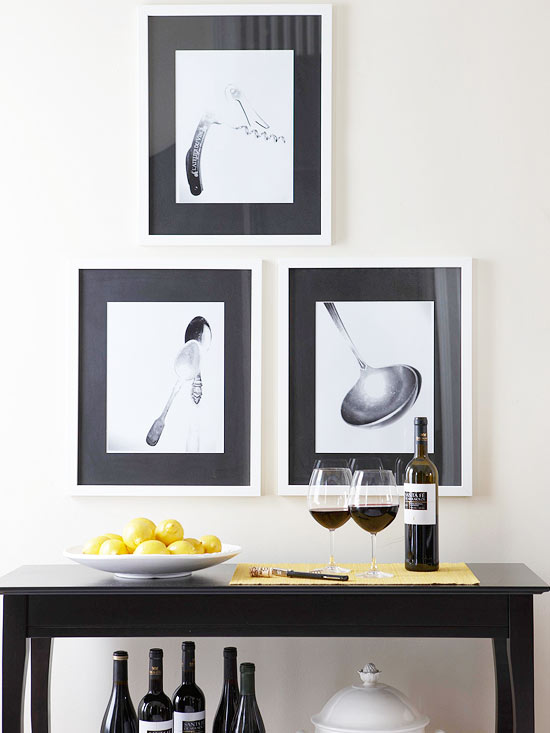
Rearrange your furniture: A little feng shui can go a long way to changing up the look and feel of your home. For example, moving your furniture away from the walls of a room creates a more intimate setting for you and your guests.

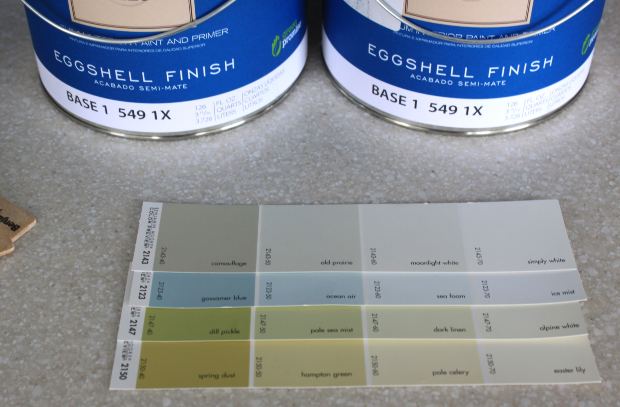
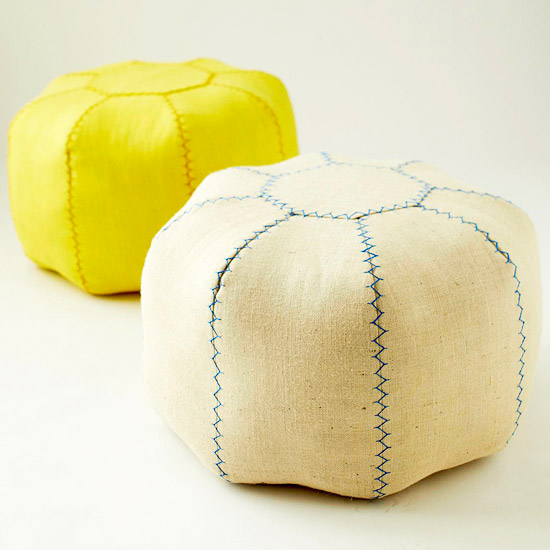
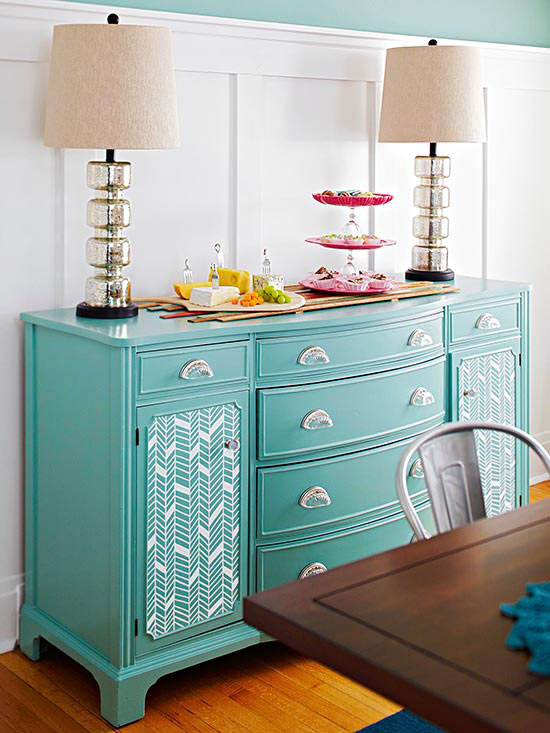
Add color: The warmer months beg for color, so why not add it inside your home? Think cheerful colors like bright yellows, royal blues, crisp whites and intense greens. Use them on your bedding, as curtains, or any other spot in your house that needs a little brightening up!

Try a bold tablecloth: Just switching out your tablecloth can make a huge difference in your dining room. Strong color combinations and graphic patterns can add just the perfect amount of punch and take no time at all.

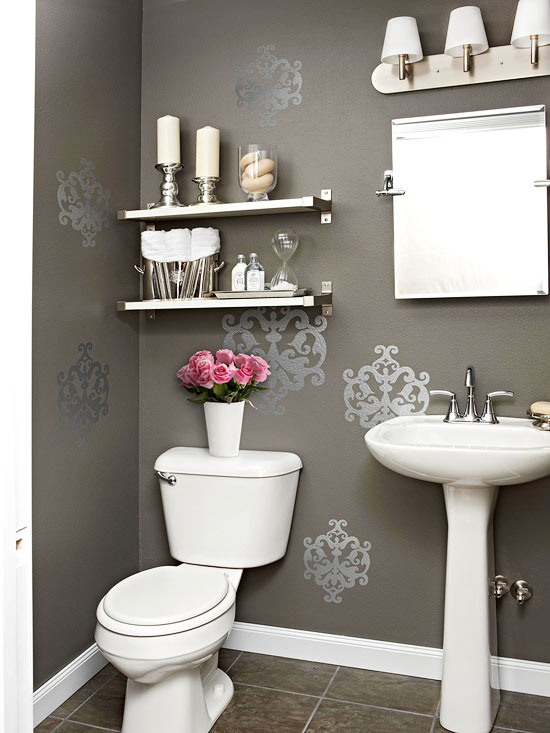
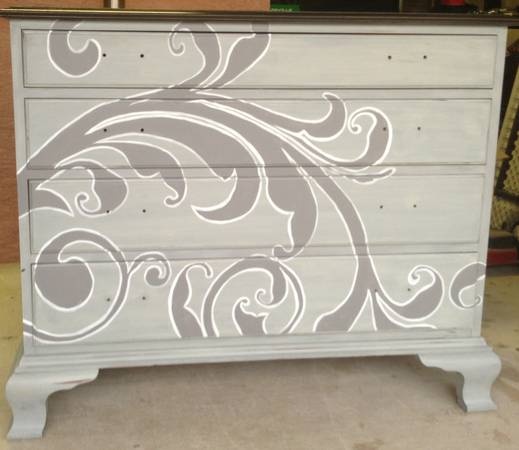
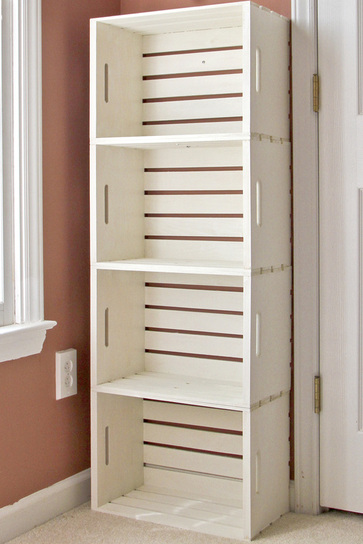
Show your shelves some love: Painting only the shelves in a room takes very little time, but can make a lasting statement. Go for eye-catching colors like orange and red, or use lighter complimentary colors that enhance what your space already has.

With these tips, you can freshen up your living space without spending a lot of time!

Filed Under: Myrtle Beach real estate Tagged With: advice, decorating, diy, home decor, tips

DIY Painting Tips

October 19, 2013 by Dargan

One of the easiest ways to update the look of your home before placing it on the market is by painting. It doesn’t matter if you are painting the interior walls a new, neutral color or if you are repainting them with the same color, your home will look cleaner and more attractive with a fresh coat of paint.

If you don’t have the money set aside in your budget to hire a painter, don’t worry! Painting your home is a task you should have no problem tackling by yourself. In fact, I painted my living room area a warm light brown just last weekend. The job can be time-consuming and tedious, but it can also improve the look of your home tremendously.

Before I began my painting project last weekend, I researched online and found a few great painting tips. I read about many things I hadn’t considered, and I also learned there were many things I’ve done wrong in the past. The tips I found were really helpful and I thought I’d share them.

paint cans

TYPES OF PAINT

Always use quality paint. There’s really no point repainting if you plan to use low quality paint. The quality will show itself on your walls, and will only result in wasted time and money. It’s definitely worth spending a bit more for a higher quality paint. Trust me on this one. Tested and proven quality brands include Benjamin Moore, Behr, and Sherwin Williams.

Finishes: flat, eggshell, semi-gloss, high-gloss

Flat paint has the least amount of shine and has a matte appearance. It absorbs light and is the best option for hiding imperfections. It goes on smoother over rough surfaces and is the best option for textured walls. It’s a bit more difficult to clean than others and isn’t ideal for high traffic areas like bathrooms and kitchens.

Eggshell (sometimes referred to as satin) has more luster than flat finishes but doesn’t leave you with a shiny wall. It resists stains better than flat and can be cleaned with a wet rag.

Semi-gloss is tougher than eggshell so it will show less wear over time, but it reflects light and doesn’t hide imperfections. It stands up best to water and cleaning and is the best choice for bathrooms or children’s rooms. Semi-gloss is often the chosen finish for trim and doors.

High-gloss should be reserved for trim and furniture because of its hard and shiny finish.

TOOLS & SUPPLIES

Supplies to consider: paint, primer, roller trays, drop cloths, painter’s tape, damp cloth

Tools to consider: nylon/polyester brushes for latex paints, rollers, screwdriver, sandpaper, paint scraper/putty knife (a 5-in-1 tool is a painter’s best friend), edger

Brush Sizes: 1 – 2″ brushes are best for smaller and tight trim areas, a 2.5 – 3″ brush is perfect for trim or corner work, and 4 – 5″ brushes are ideal for larger areas like walls

PREP

Remove as much furniture as possible. Remove pictures, mirrors, outlet covers, light fixtures, and window treatments.

Don’t use plastic sheets; use drop cloths instead. The paint won’t absorb in the plastic and you’ll end up tracking the paint everywhere.

Wash/wipe walls to remove soiled surfaces and increase adhesion. Sand glossy areas with sandpaper.

Use a putty knife to to clean out large plaster cracks and fill.

Always use painter’s tape to mask areas around doorways and windows, and “seal” the tape with the paint brush handle.

PAINTING

Always stir the paint before you begin and never paint straight from the can.

Be sure to cut in while painting–apply paint to the sides and edges of the walls before painting the middle.

To keep coats even, always apply paint to a “wet edge.”

Paint in 4×4 sections of the wall.

Paint a ‘W’ shape with the paint roller and fill in the middle.

Don’t skimp. Load up the roller–this saves time and keeps you from having to paint a second coat.To avoid drips, roll the paint onto a piece of cardboard each time to even the paint out on the roller.

Remove the painter’s tape before the paint is dry to avoid peeling off any paint and maintain perfect edges.

CLEAN UP

Use a roller scraper to remove the paint from the roller.

Place a layer of plastic between the paint can and the lid to keep it from drying out.

Immediately rinse out and wash your brushes and roller, and keep the brush in its original packaging to maintain its shape. Clean brushes by working soap into the bristles and squeezing out as much water as possible.

Always store left over paint in a cool dry place; recycle empty paint cans.

Filed Under: Myrtle Beach real estate, Myrtle Beach SC real estate Tagged With: diy, painting, preparing to sell, tips, updating your home

10 DIY Home Decorating Projects

July 17, 2013 by Dargan

Last week, I posted a few simple things that can be done to stage your home in a way that entices buyers. I recently read a great article on Better Homes & Gardens website that listed several DIY (Do-It-Yourself) projects that are quick and easy. I thought I’d share a few of them, along with a few Pinterest finds, for more ideas on adding that extra oomph to the decor in your already great property!

1. DIY Pouf

For approximately $50, add extra seating or a footrest with style to any room by making this DIY pouf. Download step-by-step instructions and take advantage of BHG’s free pattern here.

DIY Pouf


Photograph Source: Better Homes & Gardens


2. DIY Lamp Revamp

Add your own personal style to an old lamp by using ribbon and spray paint. Spray paint the base with a metallic colored paint and wrap shiny ribbon in fun, bold patterns around the lampshade. Secure the ribbon with a hot glue gun or pins. Paint your favorite quote, poem, love note, or Bible verse with acrylic paint around the lampshade instead, like Micheala at Happy Apple did in the picture shown below.

DIY Lamp Writing


Photograph Source: Happy Apple


3. DIY Photograph Masterpiece

Find simple objects you love and take pictures of them. Play around with the hue, saturation, and brightness of the photograph with an online photo editing tool. (Clueless about photo editing? PicMonkey offers a free online editor that doesn’t require a user login and is fairly simple to use.) After you’ve created the perfect picture, order large prints and frame them on black mats with white frames for a sleek modern touch.

DIY Photograph Masterpiece


Photograph Source: Better Homes & Gardens


4. DIY Bathroom Wall Design

Randomly place wall decals for added flare to your bathroom walls. They are relatively cheap and create a completely new look.

DIY Bathroom Wall Decals


Photograph Source: Better Homes & Gardens


5. DIY Roller Shade Accents

Find your favorite fabric, ask a retailer to cut the shade to fit your windows, and insert a curtain rod in the bottom pocket. Read the entire DIY description here.

DIY Refreshed Roller Shades


Photograph Source: Better Homes & Gardens


6. DIY Marble Art

Marbleizing is so trendy right now. Create your own personal marble art by marbleizing paper, scanning it, and sending the design to a print center to be printed on canvas. Waterpaper color works best for this project.

DIY Marbleizing


Photograph Source: Better Homes & Gardens
 

Directions: Fill an aluminum baking pan with about an inch of water and place it outside or on top of a drop cloth. Drop generous amounts of acrylic paint into the water in a range of coordinating colors across the surface. Mix the colors gently with a stirrer or toothpick. Too much stirring creates muddy colors so try to swirl the paint instead. Gently place a piece of the paper on top of the water and carefully lift it off. Rubber gloves will keep your hands clean. Add more paint after using three or four sheets. Alternate with contrasting colors and shades. Place the dipped paper on newspaper to dry or hang it on a clothesline with clothes pins. After the paper is completely dry, flatten it overnight by pressing it between two books.

7. DIY Patterned Furniture

One of the easiest DIY home projects is simply painting a piece of old furniture. Freshen it up a bit by replacing the knobs or handles and painting patterns or designs on drawer fronts or tabletops with paint pens.

DIY Patterned Furniture


Photograph Source: Better Homes & Gardens


Craigslist Dresser


Photograph Source: Pin found on Pinterest of Craigslist posting


8. DIY Candle Cylinders

Transform a candle into a beautiful centerpiece by wrapping pre-punched paper found at craft stores around a glass cylinder. Voila!

Prepunched Paper


Photograph Source: WeHeartIt.com


9. DIY Stone Tub

You must admit, adding stone to a bathtub is pretty genius. Blogger Rachael at Lovely Crafty Home created a brand new tub by applying a lightweight stone to it with adhesive!

DIY Stone Tub

DIY Stone Tub Complete

Photograph Source: Lovely Crafty Home

I’m sold! On the project AND the home!

10. DIY Crate Bookshelf

Build your own crate bookshelf with crates found at any craft store. Spray paint them any color you choose and secure them together with bolts. You can find complete step-by-step instructions from the blogger and inventor herself, at Calm Cradle .

DIY Crate Bookshelf


Photograph Source: Calm Cradle


Filed Under: Myrtle Beach real estate, Myrtle Beach South Carolina Tagged With: decorating, diy, home decor, photograph, staging

Quick Property Search

Choose a City
Property Type
Bedrooms
Full Baths
Min Price
Max Price
Short Sale
Foreclosure

Featured Neighborhoods

  • Plantation_Point_House
    Plantation Point Plantation Point, Myrtle Beach

logo-footer

Dargan Real Estate
9916 North Kings Hwy - Myrtle Beach, SC 29572 | Phone: (843) 712-2585
117 Stonegate Blvd - Murrells Inlet, SC 29576

Myrtle Beach | North Myrtle Beach | Surfside Beach | Garden City | Murrells Inlet | Pawleys Island | Little River | Carolina Forest | My Account